You know, I was not exactly looking forward to slicing the soap I made last weekend, but the time had come for me to take a closer look at my handiwork.
As it turns out, the results weren't as bad as I feared. So, with that in mind I am going to say that I don't make mistakes, I just take artistic license.....
Here are the results.
So, after I cut the soap I was on a roll and decided I had time to fuse some glass this weekend. I thought you would like to see pictures of some of my tools and how I have things organized.
I have my tweezers to pick up the small pieces of glass & my dichroic glass pieces in old Crystal Light containers. I have my glass separated by color and by pattern. I don't have the eye to immediately know what color I'm looking at when picking out the colored glass pieces. You see, the color is opposite of what you are looking at, it's very confusing at times. It's simpler for me just to separate them after they are cut and put them into the separate containers by color.
The work surface is black because it shows the colors better when I am putting things together. This is like a giant mouse pad and I have used it for so long that the edges are frayed. The spots you see on it are hardened Super Glue. Yes, I play with cut glass edges and Super Glue, but I am afraid of sky diving... Go figure!
Some of these I'll sell to the local bead store, some of them I'll give to my husband for wire wrap, some of them will be earrings or rings and the others will be pendants. The best part is, I get to keep what I want. Yeah, I'm selfish that way!
I hope you enjoyed looking at the pictures, now I think I'll get back to my glass.
As it turns out, the results weren't as bad as I feared. So, with that in mind I am going to say that I don't make mistakes, I just take artistic license.....
Here are the results.
 |
| Here are the slices of the multicolored soap. They'll take about 4 to 5 weeks to cure |
 |
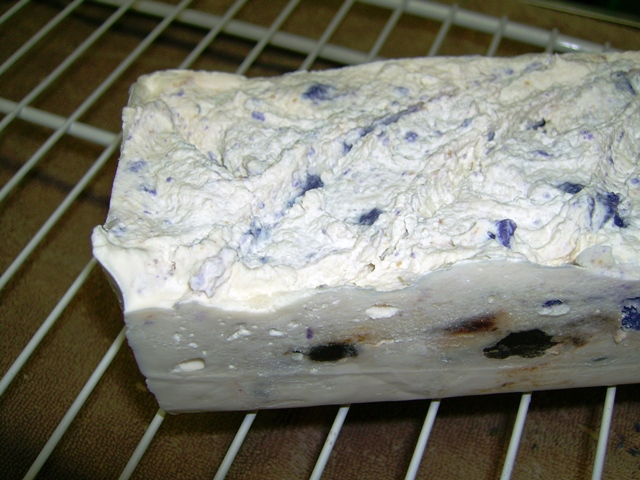
| A closer look - Yeah, I think I would use it! |
 |
| My biggest surprise was the loofah soap. Wow! It looks like a flower in the middle doesn't it? |
 |
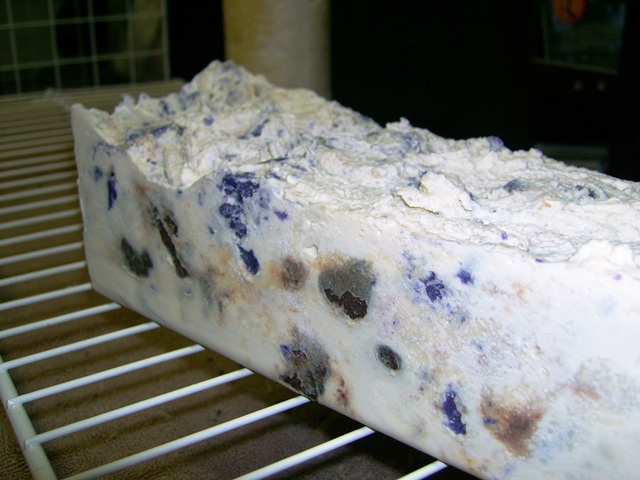
| Here is a closeup of the 'top' of the soap. If you remember from last week's blog, I didn't think the soap really soaked in. So, this is fully functional as well. By the way, I cut the soap with a serrated bread knife we don't use in the kitchen much. It's now a permanent part of my soap kitchen. |
So, after I cut the soap I was on a roll and decided I had time to fuse some glass this weekend. I thought you would like to see pictures of some of my tools and how I have things organized.
 |
| Here you see my work surface. |
The work surface is black because it shows the colors better when I am putting things together. This is like a giant mouse pad and I have used it for so long that the edges are frayed. The spots you see on it are hardened Super Glue. Yes, I play with cut glass edges and Super Glue, but I am afraid of sky diving... Go figure!
 |
| Another angle of my work surface and some of the pieces I'll be firing. to the right are some of my drawers I keep my cut glass pieces in and at the top of the picture are my colored dichroic glass pieces. |
 |
| Here is a closeup of my colored glass pieces. I have them in the drawer in rainbow order. Believe it or not, the glass on the far left is all red, even though they look blue. Now you see why I have to have the containers labeled! |
 |
| Speaking of labels, yet another close up and you can see that all my containers are labeled with the COE, the brand and color of glass. |
 |
| Here you see my cut glass 'collection.' The bottom drawer contains my dichroic pattern pieces, the middle drawer is my clear glass with some kind of pattern on them and the top drawer is just plain clear glass. I have cut these ahead of time in various shapes and sizes. When I want to cap my pieces I just have to look for one I want. |
 |
| A close up of my patterned plain glass pieces. |
 |
| This drawer contains my dichroic glass pieces that have a specific pattern on black & clear glass. These pieces actually have a ridged pattern on the glass with the dichroic coating over them. |
 |
| Here are some of the cut colored glass pieces I use for my base. I have them roughly separated by shape. |
 |
| Another closeup |
 |
| My dichroic pieces with the black & red base are the best sellers. I do make pieces with other colors too. |
 |
| Tools of the trade. Here you see my welders gloves and timer. I need the gloves because I don't want to burn my hands and arms when I am checking on my glass in the kiln. When you open an oven that is over 1400 Fahrenheit you need to take precautions. Also pictured here is my timer. I need to keep track of how long things have been in the kiln so that I can check on how they are melting and fusing. I wear it around my neck so I don't forget it if I am doing other things. |
 |
| Here are my pieces before I fired them. I need to keep them at least a quarter inch apart so they don't fuse together. I want the fusing to be up and down, not sideways! |
 |
| Here is the 'after' picture of the fused glass. This is what I saw when I opened the kiln this morning. Looking at them I think I let them fuse a bit too long, they are more rounded that what I like. They are still usable though. |
I hope you enjoyed looking at the pictures, now I think I'll get back to my glass.